Tiny Glade automatically and transparently saves its state after every action you perform.
In addition to that, Tiny Glade automatically backs up your save every 5 minutes of active play time, keeping four of those backups around, approximately 5, 10, 60 and 120 minutes old (additional backups are also created upon panics/crashes too). This means that if something catastrophic happens to your system, or Steam Cloud goes haywire, you should still be able to load a relevant backup.
Additional backups are also created before an upgrade to a new save file format, in case of an update from us.
When you create a new glade, Tiny Glade automatically creates a new save slot for it. You can access your saves through the main menu, via "Load". The list scrolls if you drag anywhere within it with your cursor, use cursor keys or controller D-Pad.
You can find save your files at:
%USERPROFILE%\Saved Games\Tiny Glade\Steam\YOUR_STEAM_ID\saves
C:\Users\YOUR_USER_NAME\Saved Games\Tiny Glade\Steam\YOUR_STEAM_ID\saves)~/.local/share/Tiny Glade/Steam/YOUR_STEAM_ID/savesThe easiest way to find this location is to go to photo mode in the game, and then click the folder icon on the toolbar. Doing so will open a file explorer app. If you then go up one level from screenshots, you'll find the saves folder there.
Each of the subfolders witin saves is one glade. If you'd like to identify which folder contains a glade you're after, it's best to sort the folders by modification date, and then check the screenshot.jpg file within.
The names, e.g. 34b2548d-ff3b-4829-aa48-03482f32bb64 are random, and are generated as UUIDs. If you'd like rename one of the subfolders, ensure that the structure of the name is the same - don't remove or add the hexadecimal characters, only change them.
If you've accidentally deleted your glade from within the game, you can still find it on your disk. It's in a folder called deleted-saves just above the saves folder. Inside you'll find subfolders with those funny names like 34b2548d-ff3b-4829-aa48-03482f32bb64. You can grab any of those subfolders and copy (or move) them into the saves folder, thus restoring them.
Your Steam Cloud data can be found here.
If you see a Steam Cloud error, do not ignore it. Try to sync again. If that doesn't work, restart Steam, and try to sync then. Failing that, consult Valve's troubleshooting page or reach out to Steam Support - otherwise Steam Cloud may overwrite your local files, and you will lose your progress.
Even with careful use, Steam Cloud has been known to lose saves, and Windows can corrupt files upon a power loss or fatal error. To reduce the risk of losing your progress, Tiny Glade automatically creates backups of your saves.
Save backups are stored alongside the saves folder (see above), in a folder named backup-saves. Note: the backups are not synced via Steam Cloud, and are local to your computer, so if you switch devices, the backups will not be synced to your other device.
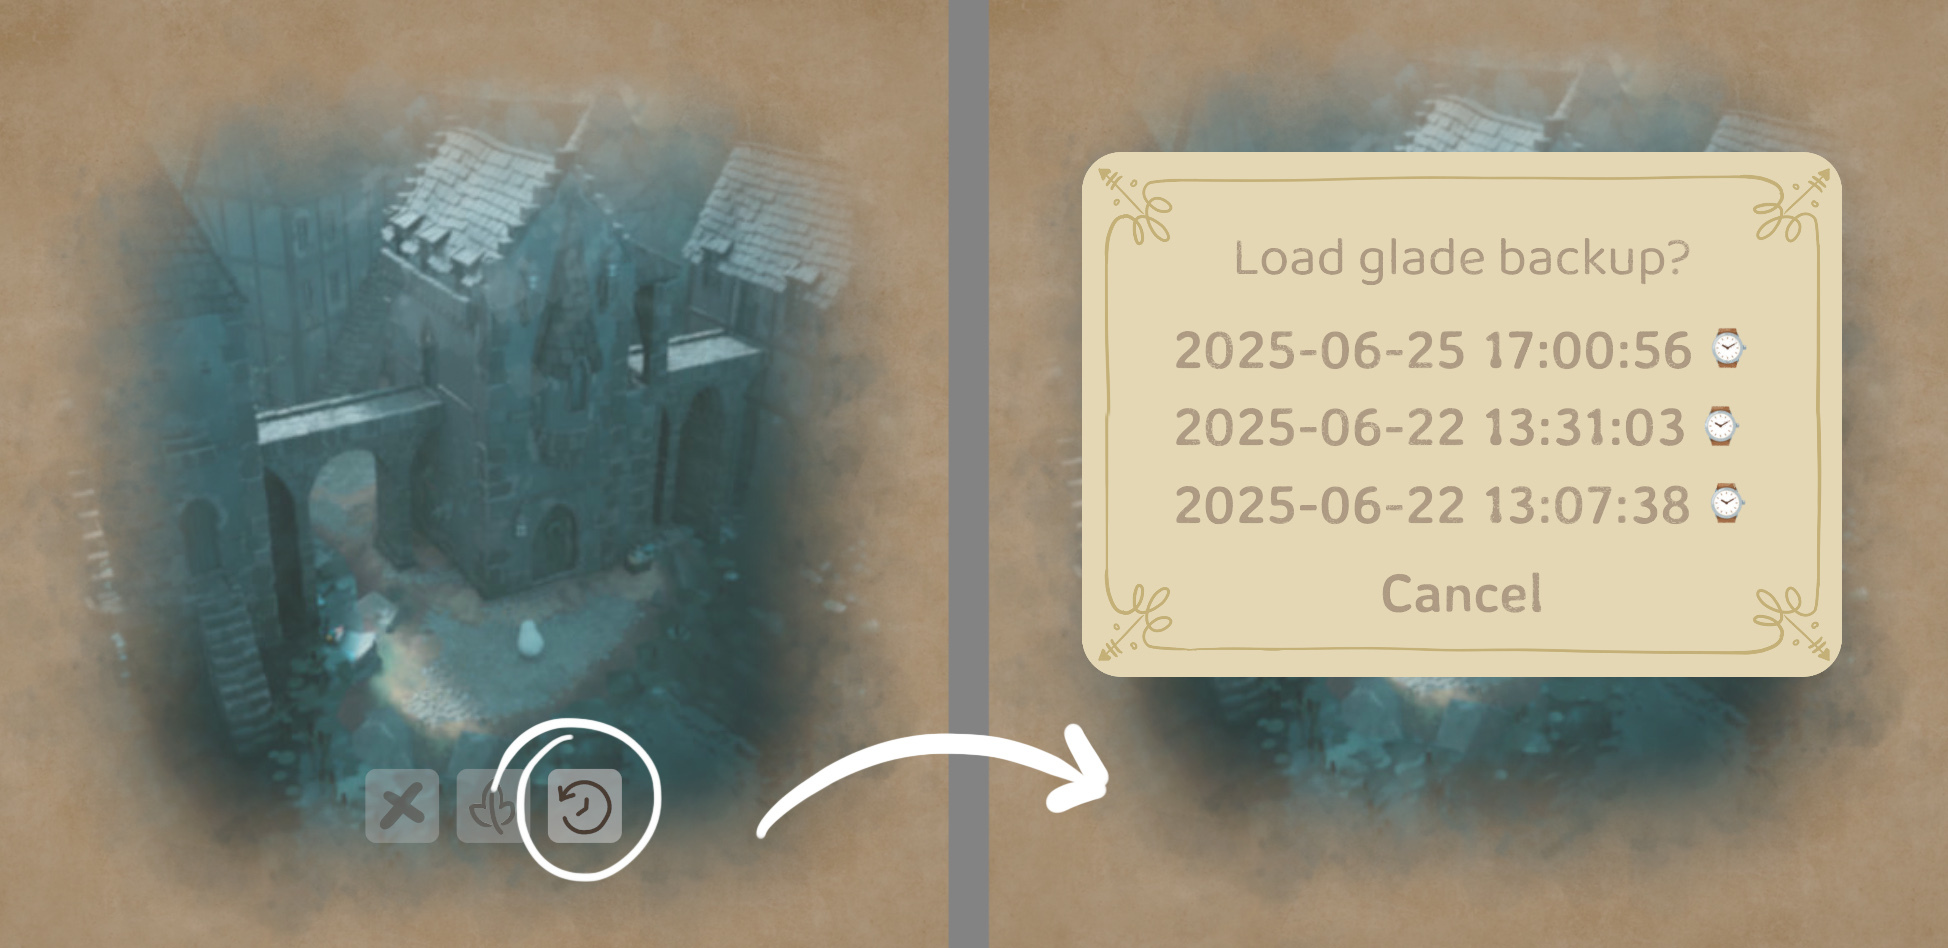
To load a backup, go to the "Load" menu in the game, and highlight (without clicking) the relevant glade. Below the glade's preview, you'll se an icon that looks like a clock with an arrow around it going "back in time". If you click that icon, you'll be presented with the list of backups for your glade.
Clicking an entry in the list will cause the backup to be loaded. Before this happens, a backup is created for your glade's current state, so that you can come back to it if you change your mind.
Please note that an older version of the game won't be able to load saves made by a newer version. Tiny Glade automatically upgrades saves upon loading, so if you downgrade Tiny Glade, it won't be able to load saves that you'd previously saved or loaded in the new version.
If your save file has already been upgraded, and you can't load it in the old game, you can restore the save from a special backup automatically created when upgrading.
screenshot.jpg within the subfolders to identify which one you need).screenshot.jpg, history.jpg etc., you'll find a file named following the pattern:
history.json-YYYY-MM-DD HH-MM-SS.json, for example. history.json-2025-07-29 00-13-01.jsonhistory.json from your save folderhistory.jsonYou can't1 move just Tiny Glade's save folder because the location is fixed in Steam (and in the game's code), which is necessary for cloud saves to work. On Windows, the saves must reside inside the "Saved Games" folder.
You can however move the entire "Saved Games" folder, which contains Tiny Glade's saves and likely those of other games. "Saved Games" is one of several special "known folders" in Windows, alongside "Documents", "Pictures", and others; their location is configurable.
⚠️ It might be a good idea to close Steam before you do this
See the "Windows 11 Forum" website for instructions on how to move the "Saved Games" folder. The steps are the same for Windows 10.
1 Advanced users might be able to use the mklink command to create a symbolic link or a junction to a different drive.